Working with metadata files
Using and understanding metadata files makes your analyses more transparent and tracktable
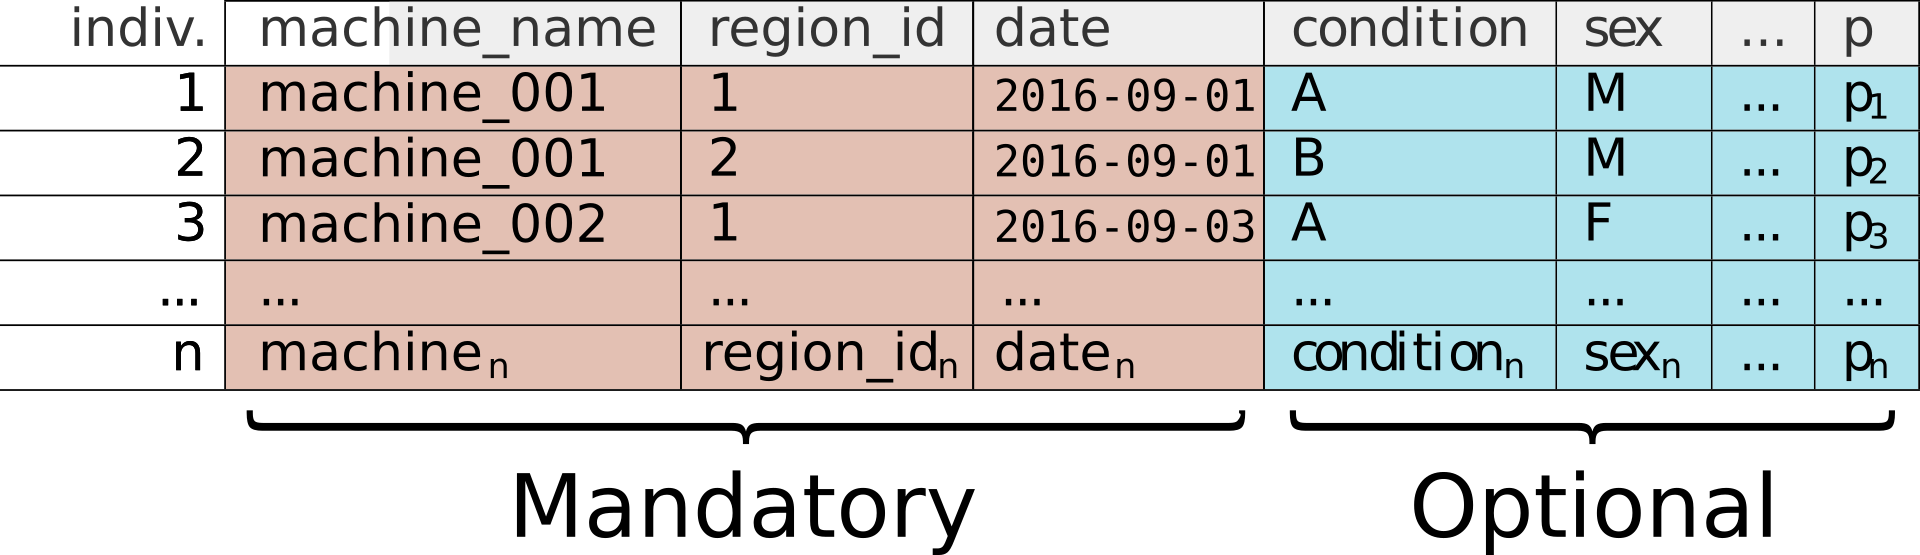
Schematic of a metadata file
What are metadata?
When performing many experiments, with multiple condidions and replicates,
it becomes challenging to keep track of each individual and to link it to its actual data.
In rethomics, regardless of the tool used to generate data, loading results always involves a metadata file.
It is, in fact, a simple CSV file (basically a spreadsheet) in which each row defines one unique individual.
As shown in the figure above, metadata is classified in two types of columns:
- Mandatory techincal columns – for instance
date,machine_nameand others (depending on the acquisition platform). They will be used to match an animal to its data. As their name suggests, they have to be filled. They contain the minimum information that the computer needs to sort your data. - Optional experimental columns – in this example,
conditionandsex. You can use as all the columns you want to characterise your experiments.
Make them exhaustive
It is a good habit to record as much information as possible in the metadata file – even if it seems redundant.
For instance, if we put animals in different incubators, we can simply add an incubator column.
This way, we keep all our experimental notes, as much as possible, inside one file.
Not only will this help us to “debug” if anything goes wrong in one incubator, but we will also be able to account for incubator as a covariate later on.
From a computational perspective, having these extra columns is virtually free as they will not impact memory or processing time down the line.
Put replicates together
A common mistake for users is to perform several replicates of the same experiment and to make a new metadata file each time. Instead, I strongly recommand you to put all replicates in the same file. If it helps,
you can add a replicate column so you can keep track of which replicate each animal comes from.
The whole point of high-througput analysis is that you can load all the data from all replicates and compare it (and maybe merge it). The bottom line is that, if you start form a single metadata file, your work will be more trackable, and you can always decide to analyse only one replicate at a time.
Think about this metadata file as something needed in a line of research or project more than a file needed for every experiment.
Linking metadata
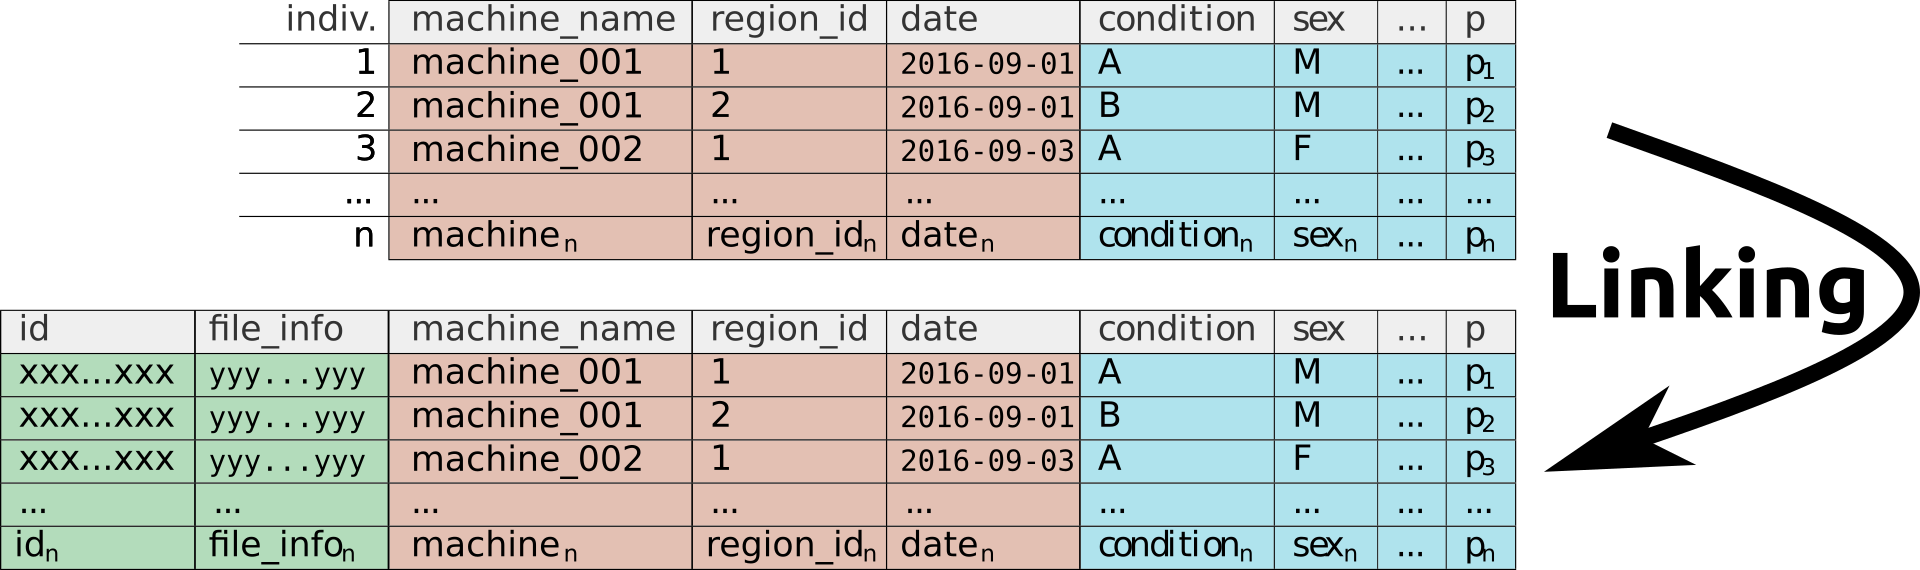
Linking adds technical columns
Once your metadata is ready, it can be used to as a query to import the matching data.
Regardless of which acquisition tool you used, the first step when importing data in R will be “metadata linking”.
This step will automatically complete the metadata file in a way that can be used for R to retrieve the right amount of data from experiment files. We call it linking, since it links the manually introduced metadata with the correct data file, something that is tedious to do manually.
In short, linking means at least:
- Adding an
idcolumn to the metadata. This will be a unique identifier for each indididual (it generally contains datetime, machine name an region id). This will diferenciate animals with the same conditions in the metadata. - Adding a column that tracks “how to find the data for each individual”( i.e. local or remote path the the data file)
Take home message
In conclusion, metadatafiles are a canonical way to both define experimental condition and load behavioural data. They are both computer and human friendly. In other words, if you pass a query on to a colaborator, she/he will be able to tell very quickly what individuals underwent which treatment, where and when.